
How to Upload Your Course on Purposelee

PURPOSELEE
How to Upload Your Course on Purposelee
A clean website-blog version for approved Purposelee Guides uploading courses.
Course Publishing Article | Blog-ready version | May 2026
Blog Introduction
This article explains how approved Purposelee Guides can create, configure, preview, and publish a course on the Purposelee platform. It is arranged in a single-column blog format so the content can be copied into a website CMS without layout issues.
Before You Begin
- Sign in as an approved Purposelee Guide.
- Prepare the course title, description, learning outcomes, target audience, duration, materials, and requirements before starting.
- Keep the course thumbnail or featured image ready in JPEG, PNG, GIF, or WebP format.
- Prepare an intro video link if the course includes a promotional or orientation video.
- Confirm whether the course should be published immediately, saved as draft, or scheduled for later release.
Step-by-Step Guide
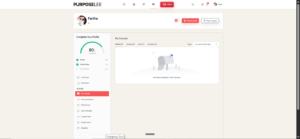
Step 1: Open My Courses and Start a New Course
Objective: Begin from the Guide dashboard and open the course creation flow.
What to do
- Go to the Purposelee dashboard after signing in as a Guide.
- From the left sidebar, open My Courses.
- Click New Course to create a new course shell.
Figure 1. Open My Courses and Start a New Course
Step 2: Review the Course Builder Basics Screen
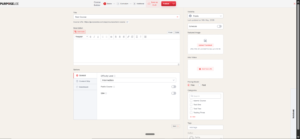
Objective: Use the Basics tab to enter the main course identity and public-facing information.
What to do
- Confirm that you are on the Basics tab inside Course Builder.
- Review the visible fields: Title, Description, Difficulty Level, Featured Image, Intro Video, Pricing Model, Categories, and Tags.
- Do not publish yet; complete the course information first.
Figure 2. Review the Course Builder Basics Screen
Step 3: Add Course Title, Description, and Difficulty Level
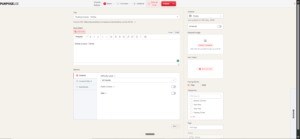
Objective: Create the foundation of the course page so learners can understand what the course is about.
What to do
- Enter a clear and professional course title.
- Write a concise course description in the Description box.
- Select the appropriate Difficulty Level, such as All Levels, Beginner, Intermediate, or Advanced.
Figure 3. Add Course Title, Description, and Difficulty Level
Step 4: Configure Content Drip Settings
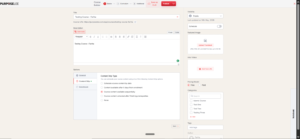
Objective: Decide how learners will access course content after enrollment.
What to do
- Open the Content Drip section under Options.
- Choose whether course content should unlock sequentially, by date, after enrollment time, after prerequisites, or not use drip at all.
- Select the option that best matches the course delivery plan.
Note: For simple courses, choose the simplest release structure unless a staged learning journey is required.
Figure 4. Configure Content Drip Settings
Step 5: Set Enrollment Rules
Objective: Control how many learners can enroll and whether enrollment should remain open.
What to do
- Open the Enrollment section under Options.
- Enter the maximum number of learners/champs allowed, if a limit is required.
- Enable or disable enrollment period settings depending on the course plan.
- Avoid pausing enrollment unless the course is intentionally closed.
Figure 5. Set Enrollment Rules
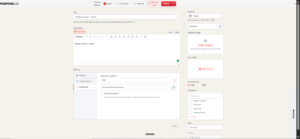
Step 6: Set Visibility, Schedule, and Course Thumbnail
Objective: Configure the course status, release timing, and featured image.
What to do
- Choose the course Visibility setting, such as Public, when the course is ready for learner access.
- Use Schedule only when the course should be released at a specific future date and time.
- Click Upload Thumbnail to add the featured image for the course page.
- Select the correct Pricing Model and category before publishing.
Note: Featured images should follow Purposelee branding and must be relevant to the course topic.
Figure 6. Set Visibility, Schedule, and Course Thumbnail
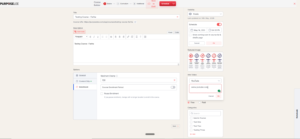
Step 7: Upload Course Media
Objective: Attach the featured image or supporting media from your device or media library.
What to do
- Click Upload Thumbnail or Add Media where required.
- Use Select Files to upload a new file, or choose an existing file from the Media Library.
- Select the uploaded media and confirm the selection.
Note: Use clear, high-quality media. Avoid screenshots or thumbnails that look unfinished.
Figure 7. Upload Course Media
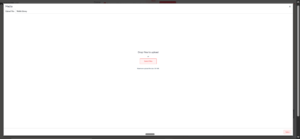
Step 8: Add Intro Video, Pricing, Category, and Tags
Objective: Complete the course discovery settings that help learners understand and find the course.
What to do
- Add the intro video URL if the course includes an introduction or preview video.
- Choose whether the course is Free or Paid.
- Select the correct category from the available list.
- Add relevant tags only if they improve search and organization.
Note: Only mark a course as Paid when price, access rules, and payment flow have been confirmed internally.
Figure 8. Add Intro Video, Pricing, Category, and Tags
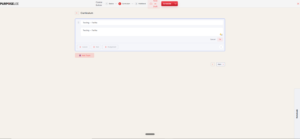
Step 9: Build the Course Curriculum
Objective: Create the course structure that learners will study inside the platform.
What to do
- Click Next to move from Basics to Curriculum.
- Click Add Topic to create a new course topic or module.
- Add Lesson, Quiz, or Assignment depending on the required learning activity.
- Save each topic or item after entering the relevant details.
Note: A strong curriculum uses clear topic names and avoids unnecessary complexity in the first version.
Figure 9. Build the Course Curriculum
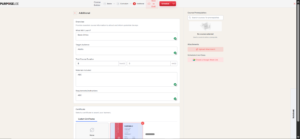
Step 10: Complete Additional Course Information
Objective: Add the supporting information learners need before enrolling or starting the course.
What to do
- Click Next to move to the Additional section.
- Fill What Will I Learn? with clear learning outcomes.
- Add the Target Audience, Total Course Duration, Materials Included, and Requirements/Instructions.
- Add prerequisites, attachments, or live class links only when required.
Figure 10. Complete Additional Course Information
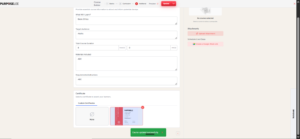
Step 11: Select Certificate and Save the Course
Objective: Choose the certificate option and save the completed setup.
What to do
- Scroll to the Certificate section.
- Select the appropriate certificate template, or choose None if the course should not issue a certificate.
- Click Update, Save as Draft, Schedule, or Publish according to the required status.
- Confirm that a success message appears after saving.
Note: If the course requires internal review, use Save as Draft or Update before final publication.
Figure 11. Select Certificate and Save the Course
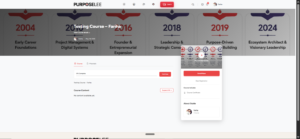
Step 12: Preview and Confirm the Published Course
Objective: Review the learner-facing course page and confirm it appears in My Courses.
What to do
- Click Preview to open the course page as learners will see it.
- Check the title, image, description, intro video, course content, certificate indicator, and Guide profile.
- Return to My Courses and confirm the course card appears in the correct tab, such as Published, Draft, or Scheduled.
Note: If anything looks incomplete in preview, return to Edit Course before sharing the course link.
Figure 12. Preview and Confirm the Published Course
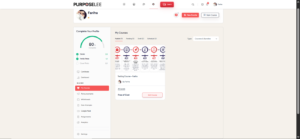
Step 13: Final Dashboard Confirmation
Objective: Confirm that the course is visible in the correct dashboard section.
What to do
- Return to the Guide dashboard.
- Open My Courses.
- Confirm the course appears under the correct status, such as Published, Draft, or Scheduled.
Figure 13. Final Dashboard Confirmation
Final Checklist
☐ Course title, description, and difficulty level are clear.
☐ Course thumbnail or featured image is uploaded and relevant.
☐ Intro video link is added if required.
☐ Pricing model, category, tags, visibility, and schedule settings are correct.
☐ Curriculum topics, lessons, quizzes, or assignments are saved properly.
☐ Additional course information is complete: learning outcomes, target audience, duration, materials, and requirements.
☐ Certificate setting is selected correctly.
☐ Course is saved, drafted, scheduled, or published according to the required status.
☐ Learner-facing preview has been reviewed before sharing the course.

Responses